Raspberry Pi Debug Probe
来自Waveshare Wiki
| ||||||||||||||||||||||
| ||||||||||||||||||||||

说明
产品简介
Raspberry Pi Debug Probe 是树莓派官方出品的一款专为 Pico 设计的 USB 硬件调试下载器,采用一体式设计,具有免焊接、即插即用的特性,可通过 SWD 接口连接目标板的调试接口进行调试。
产品特性
- 搭载 Raspberry Pi 官方自主设计的 RP2040 微控制器芯片
- 板载 Micro-USB 接口,用于连接 PC 主机或其他主板
- 板载 3PIN SWD 接口,用于连接被调试的目标板
- 板载 3PIN UART 接口,可用于实现 USB 串口转接器的功能
- 标准 CMSIS-DAP 接口,可用于调试大部分基于 ARM 的微控制器
- 适用 OpenOCD 和其他支持 CMSIS-DAP 的调试工具
- 采用树莓派同类型的 3PIN 调试接口规范
- 配备高质量透明塑料外壳以及相关连接线材
- 程序开源,升级固件更方便
资源介绍

产品尺寸

使用教程
安装OpenOCD
Linux (and Raspberry Pi)
下载依赖库
sudo apt install automake autoconf build-essential texinfo libtool libftdi-dev libusb-1.0-0-dev
获取并编译
git clone https://github.com/raspberrypi/openocd.git --branch rp2040 --depth=1 --no-single-branch
cd openocd
./bootstrap
./configure
make -j4
sudo make install
Windows
- 因为OpenOCD自编译在windows环境下比较复杂,推荐使用已经编译好的版本
- 解压并存放在比较短的目录中,如直接存放在C盘中
添加环境变量
- 点击“开始”菜单,搜索“环境变量”。
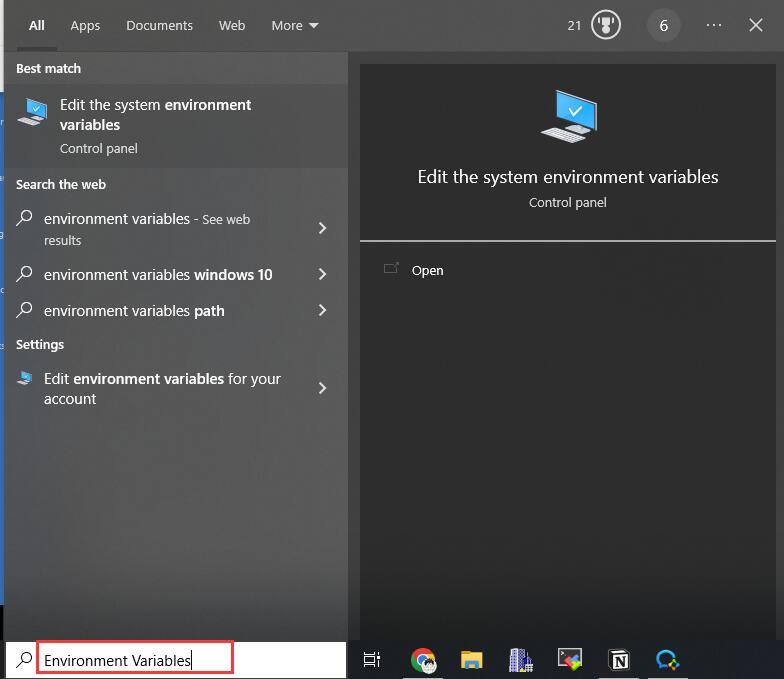
- 点击“编辑系统环境变量”

- 双击“path”变量,进入编辑界面。

- 添加新的路径
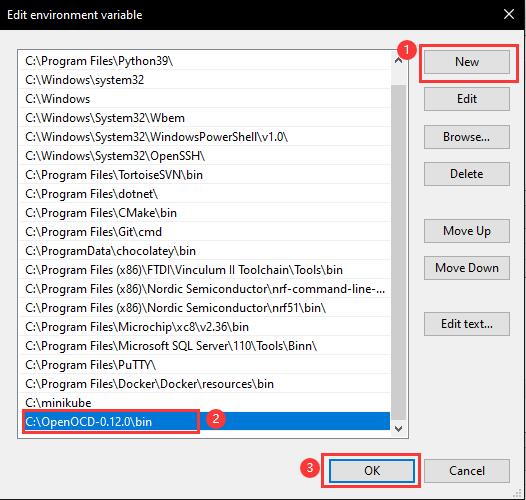
- ①创建新变量地址
- ②输入OpenOCD的存放地址
- ③点击 确定进行保存
- 点击“确定”保存更改。

- 重启电脑


安装GDB
Linux (and Raspberry Pi)
- 安装gdb-multiarch
sudo apt install gdb-multiarch
Windows
- 如果你已经正确安装了pico-sdk相关的环境,则跳过此步骤,因为GDB已经被Arm GNU Toolchain包含
- 如果你未安装pico-sdk相关的环境,建议使用官方提供pico安装程序进行安装
使用Raspberry Pi Debug Probe烧录程序
- Pico Debug Probe 可让您通过 SWD 端口和 OpenOCD 加载二进制文件
- 每次将新二进制文件推送到 Pico 时,您无需拔下然后按住 BOOTSEL 按钮
- 以对RP2040使用为例,烧录程序指令为
sudo openocd -f interface/cmsis-dap.cfg -f target/rp2040.cfg -c "adapter speed 5000" -c "program {你的elf文件名}.elf verify reset exit" - 如你当前文件夹下有一个blink.elf的文件
sudo openocd -f interface/cmsis-dap.cfg -f target/rp2040.cfg -c "adapter speed 5000" -c "program blink.elf verify reset exit"
使用Raspberry Pi Debug Probe调试程序
打开OpenOCD服务器
- 你可以让openocd在服务器模式下使用,并连接 GDB,从而为您提供断点和“正确”调试。
- 这里也是以调试rp2040为例,输入以下指令
sudo openocd -f interface/cmsis-dap.cfg -f target/rp2040.cfg -c "adapter speed 5000"
- 以windows,使用powershell为例


- 此时开始监听本机的3333接口则表明OpenOCD服务器已经成功开启了
使用GDB命令行
- 本例程基于pico-sdk环境搭建完成,并且pico-example编译完成
- 打开powershell并进入对应的build文件夹,这里以blink例程为例

- 打开gbd,输入以下指令
- 如果为windows输入指令为
arm-none-eabi-gdb blink.elf
- 如果为linux输入指令为
gdb blink.elf

- 如果为windows输入指令为
- 依次输入以下指令
target remote localhost:3333
load
monitor reset init
continue

- 就可以看到pico执行blink,led闪烁


使用VSCode调试(进阶)
- 请确保前文打开OpenOCD服务器与使用GDB命令行运行正常
- 请确保Pico编译环境搭建正常
- 请确保你的VSCode安装以下插件
- Cortex-Debug
- Cmake-tools
- C/C++
- 首先打开OpenOCD服务器
- 使用VSC打开pico-examples文件夹并打开blink例程
- 使用快捷键F1并输入以下指令
open 'launch.json'
- 打开后将下文放入其中

- 若为Windows系统则输入
{ "version": "0.2.0", "configurations": [ { "name": "Pico Debug", "type":"cortex-debug", "cwd": "${workspaceRoot}", "executable": "${command:cmake.launchTargetPath}", "request": "launch", "servertype": "external", // This may need to be arm-none-eabi-gdb depending on your system "gdbPath" : "gdb", // Connect to an already running OpenOCD instance "gdbTarget": "localhost:3333", "svdFile": "${env:PICO_SDK_PATH}/src/rp2040/hardware_regs/rp2040.svd", "runToMain": true, // Work around for stopping at main on restart "postRestartCommands": [ "break main", "continue" ] } ] }- 若linux系统则输入
{ "version": "0.2.0", "configurations": [ { "name": "Pico Debug", "type":"cortex-debug", "cwd": "${workspaceRoot}", "executable": "${command:cmake.launchTargetPath}", "request": "launch", "servertype": "external", // This may need to be arm-none-eabi-gdb depending on your system "gdbPath" : "arm-none-eabi-gdb", // Connect to an already running OpenOCD instance "gdbTarget": "localhost:3333", "svdFile": "${env:PICO_SDK_PATH}/src/rp2040/hardware_regs/rp2040.svd", "runToMain": true, // Work around for stopping at main on restart "postRestartCommands": [ "break main", "continue" ] } ] }- 两者区别为调用的gdb不同
- 进入运行与调试界面 快捷键 Ctrl+Shift+D

- ①将pico debug选为 调试器
- ②将CMake选为 debug模式
- ③开始调试按键,快捷键F5
- ④选择调试对象选为blink
- 点击调试按键进入调试模式,快捷键F5

- 出现调试工具栏

- ①重启设备
- ②继续运行程序
- ③执行一步
- ④进入函数运行
- ⑤跳出函数运行
- ⑥停止调试
- 点击继续运行程序 快捷键F5,即可看到pico运行blink例程


资料
固件
数据手册
软件
OpenOCD
Pico-SDK安装包(windows)
FAQ
技术支持
联系人:林工
EMAIL:3005425717@qq.com
电话:0755-83043099
QQ:3005425717
微信:扫下方二维码添加

说明:进行售后服务前,请准备好客户信息(定货单位、定货人等),以供验证